No Bake Cheesecake Jars
No Bake Cheesecake Jars
Spring has already made its grand entrance, and before we realize it, Summer will be upon us. For spontaneous backyard barbecues with loved ones and leisurely Sunday family gatherings at the riverside or local park picnic spot, we’ll need desserts that are simple and quick to prepare.
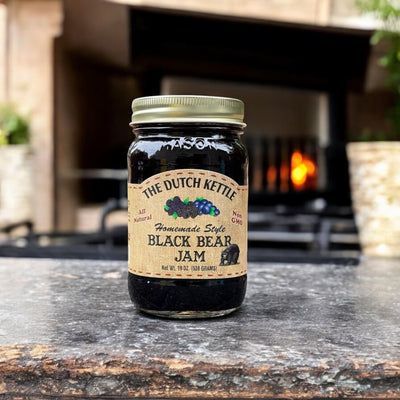
These No Bake Cheesecakes have a graham cracker crust, light cheesecake filling, and any type of topping you like, all layered in cute mason jars! Have you purchase any of Harvest Array's Jellies and Jams? Many come in 8-, 10-, and 16-ounce mason jars-perfect for this recipe, so don't throw them away! All our glass jars are not only recyclable but reusable too. Our jams and preserves also make amazing toppings for the cheesecakes.

Recipe and images adapted from sallysbakingaddiction.com.
Prep Time: 30 minutes, Cook Time: 0 minutes, Total Time: 30 minutes
Yield: 6 8-ounce jars or 10 6-ounce jars
No Bake Cheesecake Jars Recipe
Ingredients
- 2 Tbsp unsalted butter, melted
- 1 c graham cracker crumbs (about 8 graham crackers)
- 1 c heavy cream or heavy whipping cream, cold
- 8 oz. brick cream cheese, softened to room temperature. (Do not use low fat or whipped cream cheese.)
- 1/3 c granulated sugar
- 2 Tbsp sour cream at room temperature
- 1 tsp lemon juice
- 1/2 tsp pure vanilla extract
- toppings & garnishes (see notes)
Instructions
-
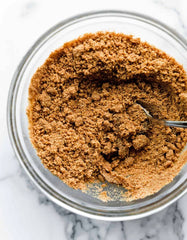
For Crust: Melt the butter in the microwave in a medium heat-proof bowl or use the stove. Stir in the graham cracker crumbs. The mixture will resemble wet sand. Spoon a generous spoonful into each jar, about 2 Tablespoons into the 8-ounce jars and 1 and 1/2 Tablespoons into the 6-ounce jars. If there’s any crust leftover, sprinkle into the jars to use up or discard. Set jars aside.
- Filling:
- Using a hand mixer or a stand mixer fitted with a whisk attachment, whip the cold heavy cream into stiff peaks on medium-high speed, about 3-4 minutes, then set aside.
- Using a hand mixer or a stand mixer fitted with a whisk or paddle attachment, beat the cream cheese, sugar, sour cream, lemon juice, and vanilla extract together on medium-high speed until smooth and creamy. Make sure there are no large lumps of cream cheese. If there are lumps, keep beating until smooth.
-
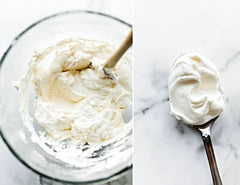
Using your mixer on low speed or a rubber spatula, fold the whipped cream into the cheesecake filling until combined. This takes several turns of your rubber spatula. Combine slowly as you don’t want to deflate all the air in the whipped cream.
-
Layer a couple large spoonfulls of filling on top of the crust in the jars. Use about 1/4 – 1/3 cup filling in the 8 ounce jars and 3 Tablespoons (or however much you can pack in!) into the 6 ounce jars. Make sure to leave room for the topping (and lid if transporting to your picnic.)

- The cheesecake jars are at room temperature at this point, but if you’d like to serve chilled, chill for at least 30 minutes and up to 3 days before adding the topping. (Cover if chilling for longer than 30 minutes.) I recommend adding the topping when serving or up to 2 hours in advance. The topping can seep down into the layers, so that’s why I recommend adding it soon before serving.
- Spoon topping and garnishes on top of filling, then serve.
- Cover and store leftover cheesecake jars in the refrigerator for up to 5 days.
Notes
- Make Ahead Instructions: These cheesecake jars can be made 1-3 days in advance. They can be refrigerated in step 7 for up to 3 days before serving. You can also make & layer the crust 1-2 days ahead of time. Another way to make these cheesecake jars ahead of time is to freeze them before adding the toppings. Seal jars with the lids and freeze up to 3 months. Thaw in the refrigerator before topping and serving. You can also freeze the cheesecake filling as a whole. Cover tightly and freeze up to 3 months. Thaw in the refrigerator before layering on top of crust.
- Topping Ideas: Harvest Array's Top Selling Dutch Kettle, Amish Made Jams, or Seedless Jams, Blue Ridge Jams and Preserves, Chocolate Syrup or Ganache, Salted Caramel Sauce, Pie Filling, and more.
- Garnishes: Fresh Berries, Chocolate Chips, Sprinkles, Mint Leaves, Whipped Cream, and more.
- Mix it up and add some flavor to the plain cheesecake filling! Add these ingredients when you beat the cream cheese, sugar, sour cream, and vanilla extract together. I recommend leaving out the lemon juice if making the peanut butter, Nutella, chocolate, or coconut variations.
- Peanut Butter: 1/3 cup creamy peanut butter
- Nutella: 1/3 cup Nutella
- Lemon: 2 extra teaspoons lemon juice + 1 teaspoon lemon zest
- Raspberry: 1 and 1/2 Tablespoons raspberry preserves
- Chocolate: 1 and 1/2 Tablespoons unsweetened cocoa powder or chocolate ganache and replace graham crackers with Oreos or chocolate graham crackers
- Coconut: 1 teaspoon coconut extract
- Key Lime: replace lemon juice with lime juice and add 2 more teaspoons of lime juice, plus 1 teaspoon lime zest.
- Don't have any reusable jars? Find Mason jars here.
- When transporting these tasty treats, be sure to put the lids on the jars and pack them in a cooler of ice.





Leave a comment